|
|
 |
|
|
|
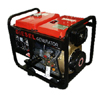
Pressure Washer Portable and Spray Washer Diesel Fueled |
|
|
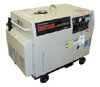
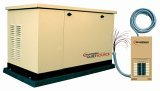
| Quiet
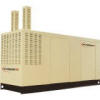
Emergency Standby Generators | RV Generators |
|
|
|
|
| ||||||||||||||||||||||||||||||||||||||||||||||||||||||||||||||||||||||||||||||||||||||||||||||||||||||||||||||||||||||||||||||||||||||||||||||||||||||||||||||||||||||||
|
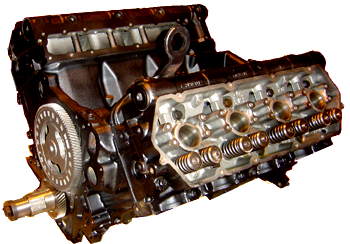
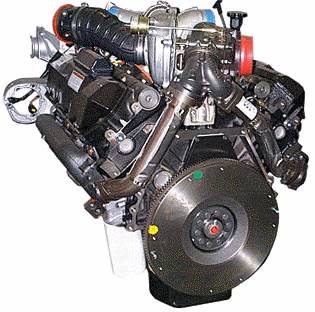
Used
Diesel Engines
Generators By Brand Name:
Automatic Home Power Systems - Emergency Power Generators - Why you need them. Marine Generators / Boat Generator
Heavy Equipment/Construction Equipment - Buy and Sell Contact
Us - E-mail The Electrical Power Store! |
ETQ Pressure Washers
Also known as:
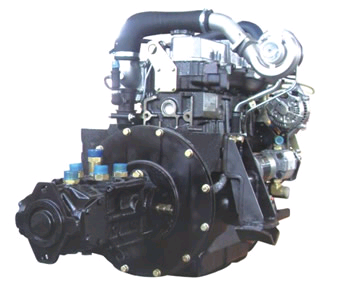
OWNER’S MANUAL Air-cooled diesel pressure washer DK003 / ZPW3000E The following manual is only a guide to assist you and is not a complete or comprehensive manual of all aspects of maintaining and repairing your pressure washer. The equipment you have purchased is a complex piece of machinery. We recommend that that you consult with a dealer if you have doubts or concerns as to your experience or ability to properly maintain or repair your equipment. You will save time and the inconvenience of having to go back to the store if you choose to write or call us concerning missing parts, service questions, operating advice, and/or assembly questions. Our diesel pressure washers have some of the following features: • Lightweight construction • Air cooled • Four-stroke diesel engine • Recoil starter (optional electric start) • Large fuel tank • Included high pressure hose • Included high pressure spray gun This manual will explain how to operate and service your pressure washer set. If you have any questions or suggestions about this manual, please contact your local dealer or us directly. Consumers should notice that this manual might differ slightly from the actual product as more improvements are made to our products. Some of the pictures in this manual may differ slightly from the actual product as well. Eastern Tools and Equipment, Inc. reserves the right to make changes at any time without notice and without incurring any obligation. TABLE OF CONTENTS Page TECHNICAL SPECIFICATIONS AND DATA 4 EQUIPMENT DESCRIPTION & KNOWING YOUR GENERATOR 6 REMOVING PRESSURE WASHER FROM CARTON 7 SAFETY PRECAUTIONS 7 PREPARATION BEFORE OPERATION 8 HOW TO OPERATE YOUR PRESSURE WASHER 10 PRESSURE WASHER MAINTENANCE 11 ENGINE MAINTENANCE 12 PREPARING THE PRESSURE WASHER FOR STORAGE 12 TROUBLESHOOTING 13 REPLACEMENT PARTS 15 LIMITED WARRANTY 19 PRODUCT REGISTRATION CARD 20 COMMENT CARD 21 APPENDIX 22 3 TECHNICAL SPECIFICATIONS AND DATA Technical specifications in SI units Item Model ZPW 3000E Continuous 17.2 Pressure (MPa) Maximum 20.7 Water flow rate (L/min) 14 Engine Model ETQ178F Type Single-cylinder, vertical, 4-stroke, air-cooled, direct injection Continuous (kw) 4.40 Output Maximum (kw) 4.9 Bore x Stroke (mm) 78 x 62 Displacement (cc) 306 Cooling system Forced air cooled by flywheel fan Lubricating system Pressure splash, duplex type lubrication Lube-oil capacity (L) 1.1 Starting system Recoil manual start and optional electric start Engine Fuel tank capacity (L) 15 Dry weight (kg) 67 Overall dimensions (Unassembled) (LxWxH) (mm) 750 x 693x 590 Technical specifications in English units Item Model ZPW 3000E Continuous 2500 Pressure (Psi) Maximum 3000 Water flow rate (US gal/min) 3.69 Engine Model ETQ178F Type Single-cylinder, vertical, 4-stroke, air-cooled, direct injection Continuous (HP) 5.9 Output Maximum (HP) 6.6 Bore x Stroke (in) 3.01 x 2.44 Displacement (cu. in.) 18.67 Cooling system Forced air cooled by flywheel fan Lubricating system Pressure splash, duplex type lubrication Lube-oil capacity (oz) 37.17 Starting system Recoil manual start and optional electric start Engine Fuel tank capacity (US gallons) 3.96 Dry weight (lbs) 148 Overall dimensions (Unassembled) (LxWxH) (in.) 29.5 x 27.3 x 23.2 EQUIPMENT DESCRIPTION & KNOWING YOUR PRESSURE WASHER Please read this manual and follow the procedures covered in this manual. Become familiar with the pressure washers functions, applications, and limitations. Below is a diagram of the locations of the various controls and functions of the pressure washer. 11 12 10 No. Description No. Description 1 Diesel engine 7 Pump head 2 Wheel 8 Connecting plate 3 Spray Gun 9 Pressure washer frame 4 Water inlet hose 10 Oil dipstick 5 High pressure hose 11 Air filter 6 Pressure gauge 12 Nozzle extension with quick disconnect. REMOVING PRESSURE WASHER FROM CARTON • Open the box and remove the high-pressure hose, handle, and parts bag included with the pressure washer. • Cut the vertical corners of the carton and roll the pressure washer out of the box instead of picking it up. CARTON CONTENTS Items included in carton • Main unit • Handle • High pressure hose • Spray gun • Owner’s manual • Engine manual • Handle hardware, including carriage bolts and flange nuts • Quick connect nozzles SAFETY PRECAUTIONS In order to ensure safety for the consumer, please carefully follow instructions on being careful with the pressure washers. Operate the pressure washer ONLY outdoors. NEVER operate the pressure washer indoors as the engine gives off poisonous carbon monoxide, an odorless, and colorless gas. Inhaling carbon monoxide will cause nausea, fainting or death. Also, keep the pressure washer at least 3 feet away from flammable matter for adequate ventilation. REFUELING PRECAUTIONS Please follow the guidelines listed below when adding fuel. • Turn the pressure washer OFF and let it cool at least 2 minutes before removing the gas cap. • Always fill the fuel tank outdoors. • Keep fuel away from sparks, open flames, pilot lights, heat, and other igniting sources. • Never overfill the tank and also allow some extra space for fuel expansion. • Do not smoke or light cigarettes. WHEN OPERATING EQUIPMENT • Operate the pressure washer on level surfaces only. Inclined surfaces reduce the effective lubrication of the engine. • Do not spray flammable liquids WHEN TRANSPORTING OR REPAIRING EQUIPMENT • Transport / repair with the fuel tank empty or with fuel shutoff valve in the OFF position. WHEN STORING FUEL OR EQUIPMENT WITH FUEL IN TANK • Store away from furnaces, stoves, water heaters, clothes, dryers or other appliances that have pilot light or other ignition sources because they can ignite fuel vapors. SPRAYING • Always keep the water spray away from electrical wiring or a fatal electric shock may occur. • The high pressure of the equipment can pierce skin and its underlying tissues. Leading to serious injury and possible amputation. • Never aim the spray gun at people, animals, or plants. • Never let children operate or get new the pressure washer. • Do not repair the high pressure hose; replace it. • Always wear eye protection when near or using this equipment. • When in jet spay mode, do not point spray gun at glass. • Never aim the spray gun at plants. BATTERY (optional: for electric start models only) Batteries contain battery acid or electrolyte fluid or battery acid. Batteries emit hydrogen gases as battery is being charged. The slightest spark will ignite hydrogen and cause an explosion. Note: Our units come shipped with a dry battery for safety shipping purposes. Dry batteries need to be filled with electrolyte solution (battery acid) before use. During use, the battery level should be checked at least once a month to make sure they are between the high and low marks. ENGINE SAFETY PRECAUTIONS Do not touch hot surfaces. Allow equipment to fully cool down before touching. After the pressure washer has been run, the engine produces heat. The temperatures of the muffler and nearby areas can reach or exceed 1600F. Severe burns will occur on contact with skin. Do not modify the pressure washer in anyway. The pressure washer supplies the rated pressure and rated flow rate at its governed speed. PREPARATION BEFORE OPERATION If you have any problems with the assembly of your pressure washer or if parts are missing or damaged, please call your local dealer. Please follow the following guidelines to prepare your pressure washer for operation. • Fill out and send in the registration card from the owners manual • Attach the handle to the main unit. • Add 15W40 oil to the engine. • Add diesel fuel to the fuel tank. • Attach the high-pressure hose to the pump and to the spray gun. • Connect the water supply to the pump. • Install the desired nozzle. ATTACHING HANDLE AND REEL Use an adjustable wrench to attach the handle to the pressure washer. • Align the holes on the handle with the holes on the base. • Insert the carriage bolts provided to hold the handle in place (Figure 1.) • Insert the carriage bolts provided to hold the hose reel in place. Figure 1. Cart and handle assembly ADDING OIL AND INSTALLING OIL DIPSTICK ON PUMP Caution: You must remove the pump’s oil cap and fill the pump with oil with SAE30 oil. Failure to do so will void the warranty and damage the pump. • Make sure the unit is on level surface • Remove the oil cap and fill with oil. Attach the oil cap back into place after oil has been filled. ADDING ENGINE OIL • Make sure pressure washer is on a level surface • Fill the engine with SAE15W40 engine oil until the dipstick reads full. This is approximately 40 ounces. NOTE: Please check the engine oil frequently during engine break in. Refer to the engine owner’s manual for recommendations. ADDING FUEL • Do not fill fuel tank indoors as there is not enough proper ventilation. • Do not smoke while filling fuel tank • Do not overfill the fuel tank and always leave extra space for fuel expansion. Always wipe away any fuel spillage. • Clean the area around the fuel fill cap and place the fuel cap back into place. CONNECTING THE HOSE AND WATER SUPPLY TO PUMP HEAD WARNING: All hoses must be attached before starting the engine. Starting the engine without all the hoses connected and water supplied will damage the pump. • Uncoil the high-pressure hose and attach the female connector on the hose to the male connector on the pump. • Attach the other connector on the high-pressure hose to the spray gun. Pull on the hose to verify a tight connection. • Before connecting your garden hose to the pump head, verify to make sure the filter screen is clean. Also, if the screen is damaged, please replace the filter before connecting the garden hose to the pump head. To prevent buildup of debris on your pump head filter, run the garden hose for 30 seconds to clean out any debris in the garden hose before connecting it to your pump head. • Tighten the garden hose by hand. • Turn on water and squeeze trigger on the gun to purge the pump system of air and debris. NOTE: Before starting the pressure washer, be sure you are wearing adequate eye protection. HOW TO OPERATE YOUR PRESSURE WASHER STARTING THE ENGINE. Before starting the engine, verify that the engine oil is full, fuel is full, and air filter is in place. Be sure that all hoses are tightened and the handle is secure. Provide a proper water supply (not to exceed 100 degrees F) with a minimum flow of 3.3 gallons per minute. • Make sure the unit is in a level position. • Turn the fuel valve to the “ON” position. • Set the speed governor switch to the “RUN” position. • Pull on the recoil handle until the engine starts. NOTE: Do not let the rope snap back against the starter. • If your unit comes with an optional electric starter, please turn the key to the start position until the engine starts. Once the engine turns over, release the key so it can automatically return to the “ON” position. STOPPING THE PRESSURE WASHER • Push the stop lever on the speed governor of the engine. • Move the fuel valve to the “Off” position. • Wait for the engine to idle down. • To relieve the system pressure, squeeze the spray gun trigger to relieve the pressure in the hose. USING THE NOZZLES Always be sure that the trigger is locked and that there is no pressure at the nozzle before changing the nozzle. Please follow these guidelines to change nozzles. • Engage the safety latch on the spray gun. • Twist the nozzle on the spray gun off and put it in a safe place. • Choose the desired nozzle and twist it back on the spray gun being careful to not over-tighten the nozzle. • Always keep the spray nozzle about 1 to 2 feet away from the cleaning surface. Having the spray nozzle too close to the cleaning surface may damage your cleaning surface. CLEANING AND USING CHEMICALS All hoses must be attached to the pump head before starting. Starting the pump head without all the hoses connected will damage the pump. Do not use household detergents for the pressure washer. Use only specially designed detergents for the pressure washer. Please follow these guidelines to apply detergents • Use the proper nozzles. • Prepare the detergent as required by the manufacturer of the detergent. • Place the strainer and chemical injection siphon/filter into the detergent container. • Make sure the garden hose is connected to the pump head. Many users prefer to use a container supply of water with the garden hose water running into the container. There is a hose connected from the container of water to the pump head. Just be sure the water level is full in the container. • Apply the detergent to a dry surface, starting at lower portion of area to be washed and work upward, using long, even, overlapping strokes. Do not allow the detergent to dry on the surface (prevents streaking). PRESSURE WASHER RINSING When using the pressure washer spray gun, be careful of the backwards kick from the spray gun, especially while on a ladder or on an elevated position. • Remove the chemical nozzle from the spray gun extension. • Choose the desired high-pressure nozzle following the guidelines for installing a nozzle. • Always keeping a good distance from the surface, adjust the desired pressure by turning the knob clockwise and counterclockwise respectively. Use lower pressure to wash items that have nice painting finishing. Use higher pressure to strip paint and degrease driveways. • A high-pressure spray could be applied to a small area for maximum cleaning pressure. Before continuing, make sure there is no damage found. If no damage is found it is okay to continue cleaning. • Start at the top of the area to be rinsed, working down with same overlapping strokes as you used for cleaning. PRESSURE WASHER MAINTENANCE Before using your pressure washer • Always check engine oil before using • Always check the water inlet screen for debris or damage. If damaged, replace if necessary. • Check high-pressure hose for leaks. • Check spray gun, nozzle extension, and nozzles for leaks.• Check detergent siphoning tube and filter for damage. • Always flush out debris from garden hose by running water through it before connecting it to the pump head. PUMP MAINTENANCE Change the pump oil after the first 50 hours of operation; this is the break in period. Then every oil change will be after 200 hours of use or 3 months; whichever comes first. To change the pump oil, please follow the guidelines below • Clean the area around the oil drain plug at the bottom of the pump. • Remove the drain plug and drain all the oil into a container. • When oil has completely drained, install the oil drain plug back into place and tighten firmly. • Clean the area around the pump oil dipstick and remove the dipstick. Fill will SAE30 weight oil until the “FULL” mark on the dipstick has been reached. • Install the oil dipstick. • Wipe up any spilled oil and take the used oil to a recycling center. ENGINE MAINTENANCE See the engine owner’s manual for instructions on how to properly maintain the engine as well as a complete parts list of the various engine components. PREPARING THE UNIT FOR STORAGE Water causes deposits and rust. If you do not plan to use the pressure washer for more than a month, please follow these procedures. • Flush the detergent siphoning tube by placing the filter into a bucket of clean water while running the pressure washer in low-pressure mode. Repeat this procedure for a few times. • Shut the engine off and let it cool, then remove all the hoses. • Clear out the liquids remaining in the pump by pulling the recoil handle about 6 times. This should flush out the remaining liquid within the pump. • Store the unit in a clean and dry place. • Also, refer the engines owner’s manual for instructions on storing the engine for long periods of time. TROUBLESHOOTING REPLACEMENT PARTS EXPLODED VIEW - PUMP Figure 1. Pump exploded view PARTS LIST – PUMP Table 1. Please refer to figure 1 for a complete illustration No. Description Qty. Part Number 1 M6 x 16 Bolt 10 ETQ3ZPW1 2 Spring gasket 18 ETQ3ZPW2 3 Oil bolt 2 ETQ3ZPW3 4 O ring seal 13.2 x 2.65 3 ETQ3ZPW4 5 M8 x 16 bolt 1 ETQ3ZPW5 6 106 x 3.55 O ring seal 1 ETQ3ZPW6 7 Cover 1 ETQ3ZPW7 8 47.5 x 1.8 O ring seal 1 ETQ3ZPW8 9 M8 x 16 bolt 1 ETQ3ZPW9 10 Spring gasket 5 ETQ3ZPW10 11 Gasket 1 ETQ3ZPW11 12 Bearing (304) 1 ETQ3ZPW12 13 Case 1 ETQ3ZPW13 14 Connecting rod pin 3 ETQ3ZPW14 15 Piston 3 ETQ3ZPW15 16 Oil Seal 3 ETQ3ZPW16 17 Washer 3 ETQ3ZPW17 18 Connecting rod 3 ETQ3ZPW18 19 Eccentric shaft 1 ETQ3ZPW19 20 Bearing 524909 1 ETQ3ZPW20 21 Spacer 1 ETQ3ZPW21 22 Seal B4255814 1 ETQ3ZPW22 23 63 x 2.65 O ring seal 1 ETQ3ZPW23 24 Connecting flange 1 ETQ3ZPW24 25 Gasket 4 ETQ3ZPW25 26 Spring gasket 4 ETQ3ZPW26 27 M10 x 25 Bolt 4 ETQ3ZPW27 28 M8 x 220 Bolt 4 ETQ3ZPW28 29 Oil window 1 ETQ3ZPW29 31 Water inlet tube 1 ETQ3ZPW31 32 15 x 2.65 O ring seal 6 ETQ3ZPW32 33 Water intake/exhaust valve seat 6 ETQ3ZPW33 34 Water intake/exhaust valve washer 6 ETQ3ZPW34 35 Water intake/exhaust valve spring 6 ETQ3ZPW35 36 Water intake/exhaust valve seat cover 6 ETQ3ZPW36 37 18 x 2.65 O ring seal 6 ETQ3ZPW37 38 Water intake/exhaust valve cover 5 ETQ3ZPW38 39 M6 x 60 bolt 8 ETQ3ZPW39 40 Water return connector 1 ETQ3ZPW40 41 Water return hose 1 ETQ3ZPW41 42 Water plug 1 ETQ3ZPW42 43 Pressure gauge 1 ETQ3ZPW43 44 Gasket 1 ETQ3ZPW44 45 Pressure gauge connection 1 ETQ3ZPW45 46 24 x 1.8 O ring seal 3 ETQ3ZPW46 47 Sub seal seat 3 ETQ3ZPW47 48 Sub seal 3 ETQ3ZPW48 49 Main seal seat 3 ETQ3ZPW49 50 V seal 3 ETQ3ZPW50 51 V ring 3 ETQ3ZPW51 52 Pump 1 ETQ3ZPW52 53 Water intake connector 1 ETQ3ZPW53 54 JH10-02 gasket 1 ETQ3ZPW54 55 JH10-03 connector 1 ETQ3ZPW55 56 JH10-01 water outlet connector 1 ETQ3ZPW56 57 Unloader valve 1 ETQ3ZPW57 58 Banjo connector 1 ETQ3ZPW58 59 Banjo bolt seal 2 ETQ3ZPW59 60 Banjo bolt 1 ETQ3ZPW60 61 Water output connector 1 ETQ3ZPW61 CART ASSEMBLY Figure 2. Illustration of cart assembly PARTS LIST – CART ASSEMBLY Table 2. Please refer to figure 2 for illustration Number Description Qty Part Number 1 Bracket plate 1 ETQ3ZPW62 2 Frame 1 ETQ3ZPW63 3 Spool support bracket 2 ETQ3ZPW64 4 Hose spool 1 ETQ3ZPW65 5 Foam grip 4 ETQ3ZPW66 6 Handle 1 ETQ3ZPW67 Collar 2 7 Collar clamp 2 ETQ3ZPW68 M5 x 25 bolt 4 Flat gasket 5 8 Spring gasket 4 8 M5 nut cap 4 ETQ3ZPW69 M6 x 45 bolt 4 Flat gasket 6 8 Spring gasket 4 M6 nut cap 4 9 Nylon gasket 6 4 ETQ3ZPW70 M6 x 50 (45) bolt 4 Flat gasket 6 8 Spring gasket 6 4 M6 cap nut 4 10 Rubber gasket 4 ETQ3ZPW71 11 Wheel 2 ETQ3ZPW72 12 Motor mount 4 ETQ3ZPW73 LIMITED WARRANTY Eastern Tools & Equipment, Inc. will repair or replace, free of charge, any part or parts of the generator that are defective in material or workmanship or both. Transportation charges on parts submitted for repair or replacement under this Warranty must be borne by purchaser. This warranty is effective for the time period and subject to the conditions provided for in this policy. For warranty service, find the nearest Authorized Service Dealer by contacting the place of purchase or Eastern Tools & Equipment, Inc. THERE IS NO OTHER EXPRESSED WARRANTY. IMPLIED WARRANTIES, INCLUDING THOSE OF MERCHANTABILITY AND FITNESS FOR A PARTICULAR PURPOSE, ARE LIMITED TO ONE YEAR FROM PURCHASE, OR TO THE EXTENT PERMITED BY LAW ANY AND ALL IMPLIED WARRANTIES ARE EXCLUDED. LIABILITY FOR CONSEQUENTIAL DAMAGES UNDER ANY AND ALL WARRANTIES ARE EXCLUDED TO THE EXTENT EXCLUSION IS PERMITTED BY LAW. Some states do not allow limitations on how long an implied warranty lasts, and some states do not allow the exclusion or limitation of incidental or consequential damages, so the above limitation and exclusion may not apply to you. This warranty gives you specific legal rights and you may also have other rights, which vary from state to state. Eastern Tools & Equipment, Inc. WARRANTY PERIOD WITHIN U.S.A AND CANADA OUTSIDE U.S.A. AND CANADA ENGINES CONSUMER USE COMMERCIAL USA CONSUMER USE COMMERCIAL USE Diesel pressure washer 1 year Or 1000 hours 1 year Or 1000 hours 1 year Or 1000 hours 1 year Or 1000 hours About Your Product Warranty Eastern Tools & Equipment, Inc. welcomes warranty repair and apologizes to you for being inconvenienced. Any Authorized Service Dealer may perform warranty repairs. Most warranty repairs are handled routinely, but sometimes warranty service may be inappropriate. For example, warranty would not apply if an engine were damaged because of misuse, lack of routine maintenance, shipping, handling, warehousing and improper installation. Similarly, warranty is void if the serial number on the engine has been removed or if the engine has been altered or modified. If a customer differs with the decision of the Service Dealer, an investigation will be made to determine whether the warranty applies. Ask the Service Dealer to submit all supporting facts to his Distributor or the factory for review. If the distributor or the factory decides that the claim is justified, the customer will be fully reimbursed for those items that are defective. To avoid misunderstanding, which might occur between the customer and the dealer, listed below are some of the causes of engine failure that the warranty does not cover. Normal wears: Engines and generators, like all mechanical devices, need periodic parts service and replacement to perform well. Warranty will not cover repair when normal use has exhausted the life of a part of an engine. Improper maintenance: The life of an engine or your equipment depends upon the conditions under which it operates, and the care it receives. Some applications, such as tillers, pumps, and rotary movers, are very often used in dusty or dirty conditions, which can cause what appears to be premature, wear. Such wear, when caused by dirt, dust, spark pug cleaning grit, or other abrasive material that has entered the engine because of improper maintenance is not covered by warranty. Click here to download the Product Manual
| |||||||
| 2001 The Power Store! | ||||||||
|
100 W Southern St. , 80601 | ||||||||
|
|
|
Sitemap | Website Design by Search Engine First Place


